EliteCart allows you to customize your store’s language and wording for a personalized shopping experience. This guide walks you through the steps to set up and manage languages and translations in your app.

1. Navigate to Language & Translations: On the EliteCart dashboard, click on the Language & Translations option in the menu. This is where you can edit all words for all languages.
2. Select a Language: On the Language & Translations page, you’ll see a list of your store languages. If a language isn’t visible, you can scroll all the way down and click the Refresh button. Still not visible? Make sure that the language is set up in your Shopify settings.
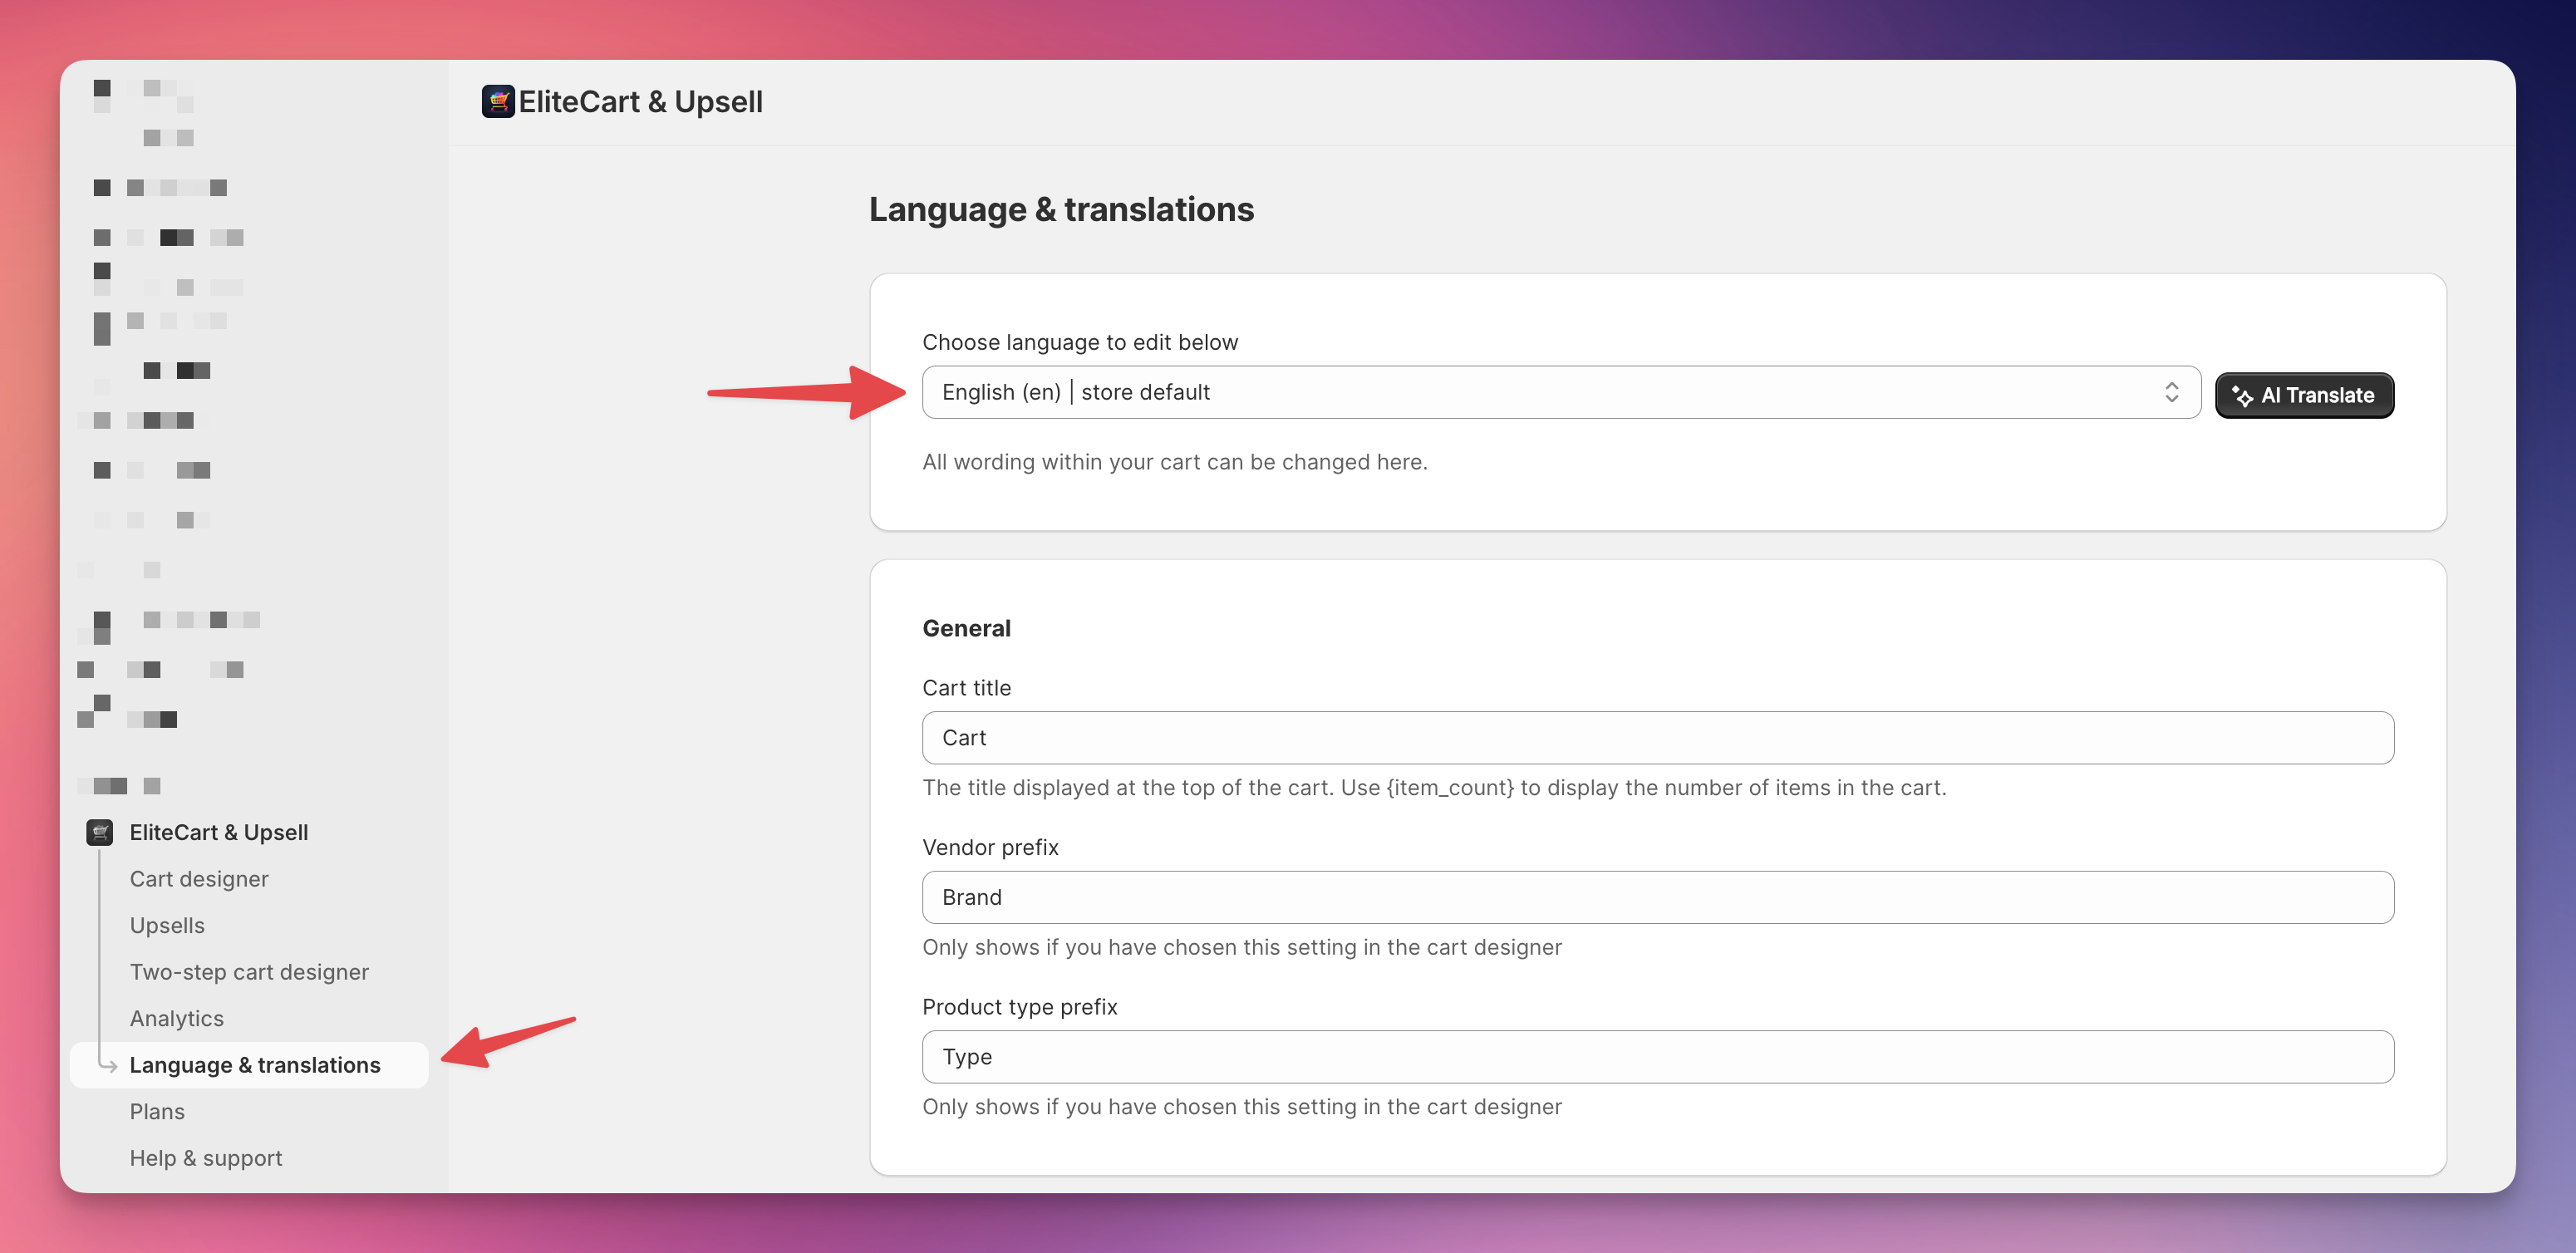
Edit Wording: Select the language you wish to edit. You can then update the texts as needed.
Dynamic Variables: For some texts, you can insert dynamic variables like {title} or {price}. These must remain in English for correct functionality.
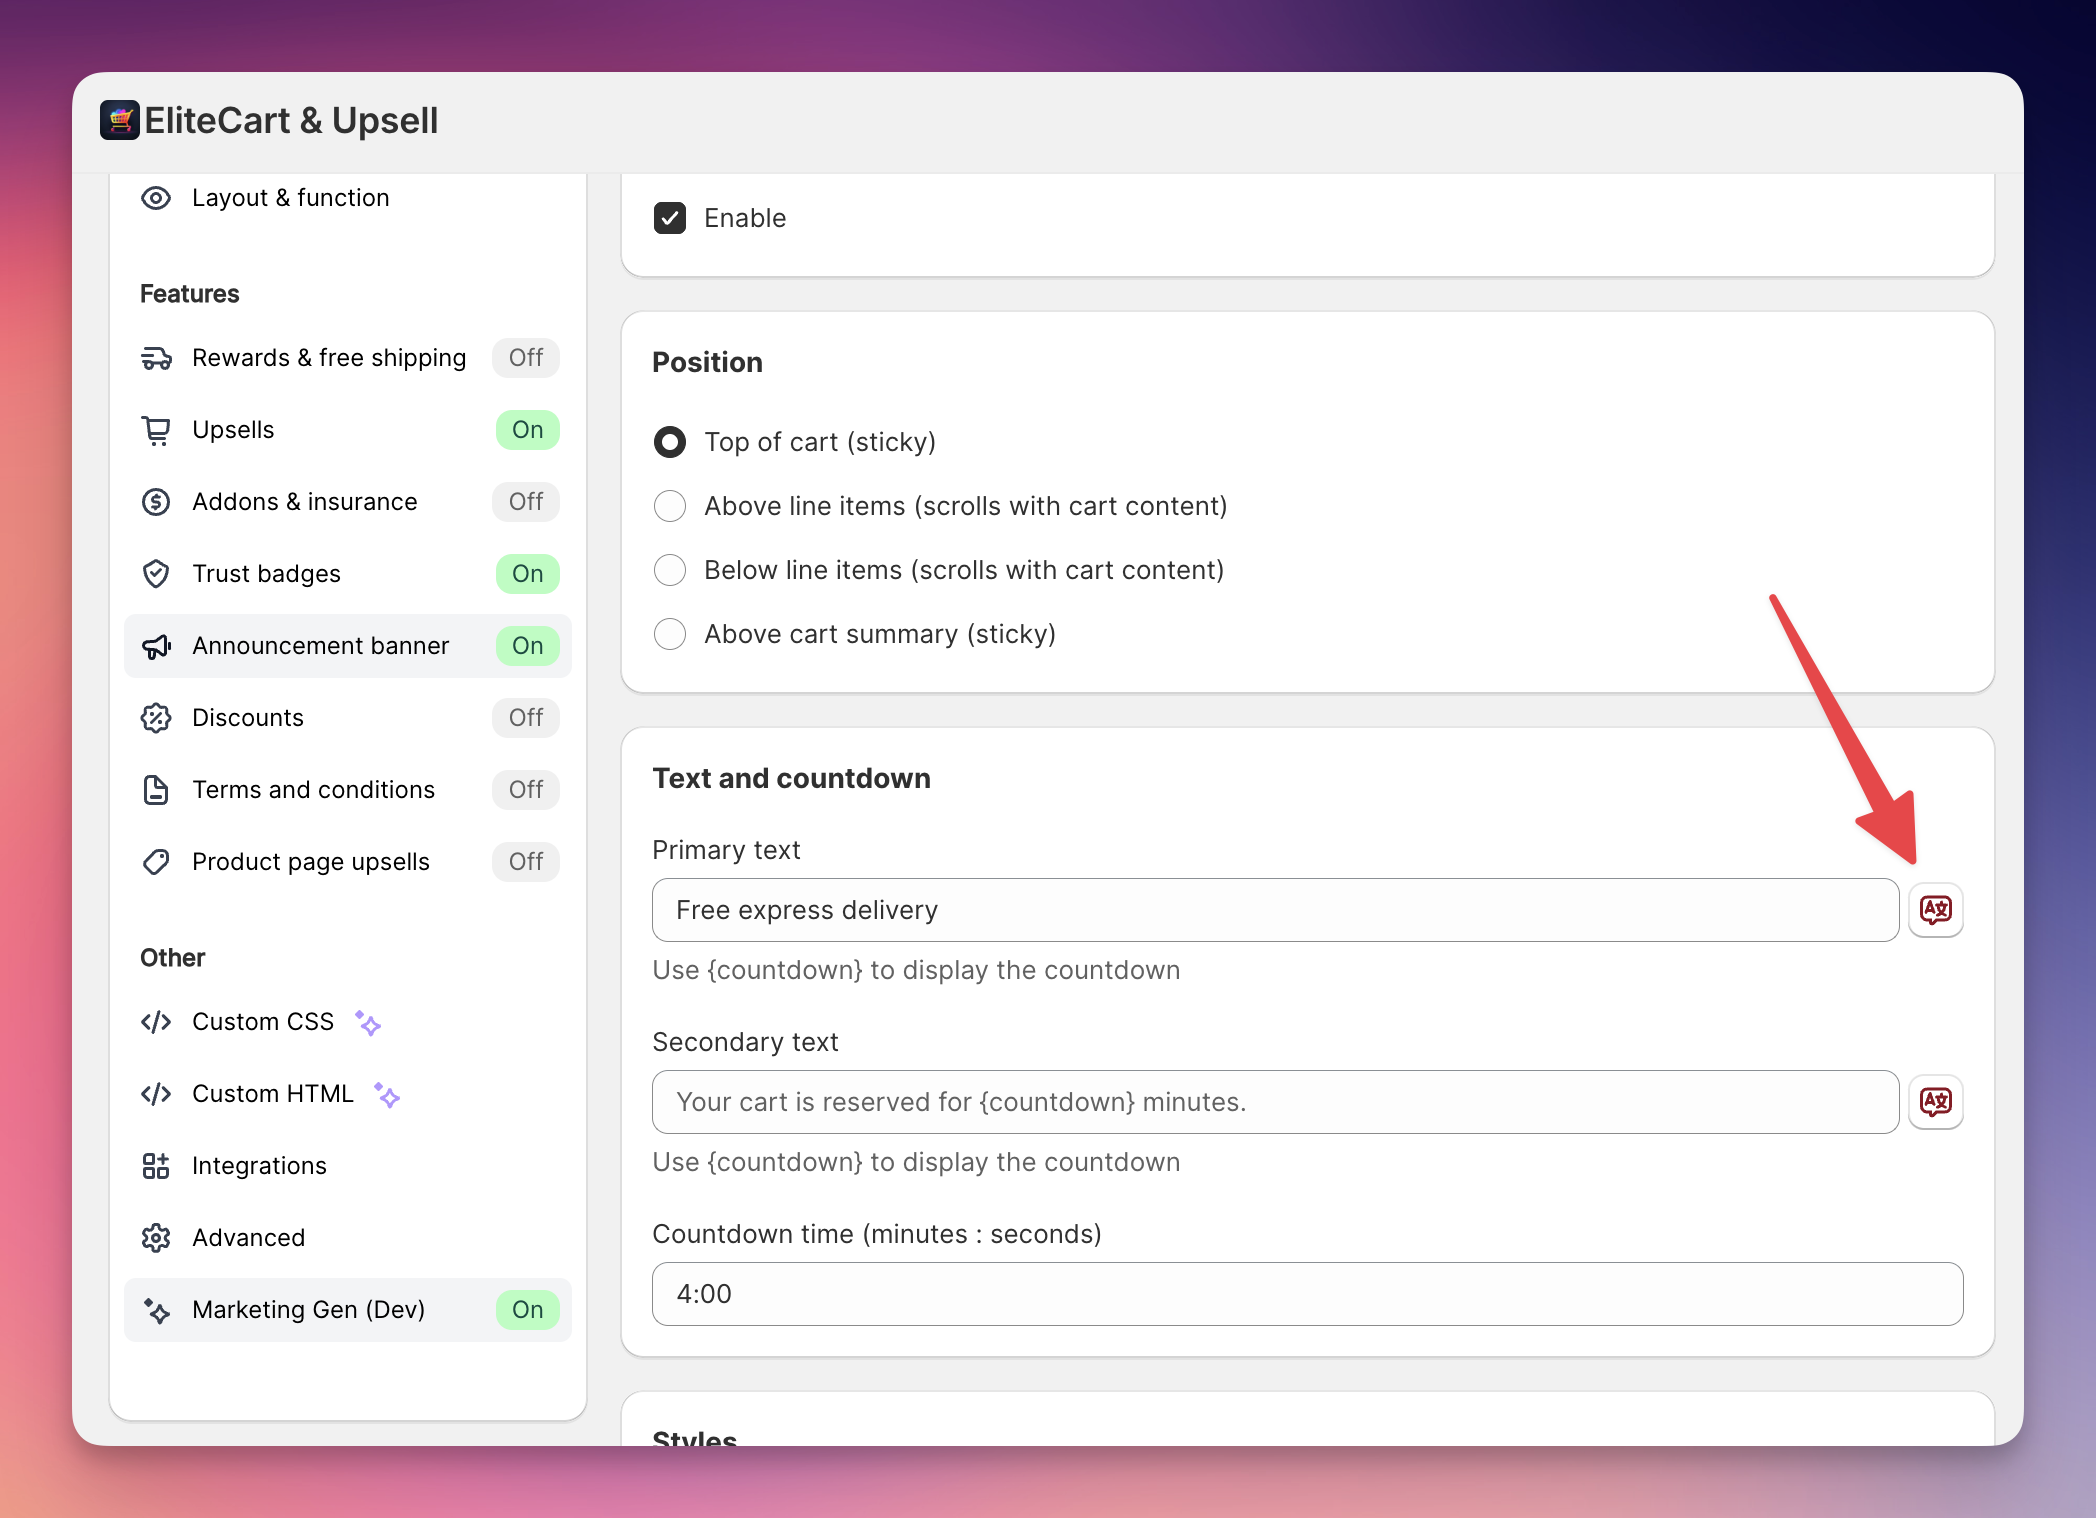
Translate Button: In the Cart Designer, for all relevant texts, you will find a Translate button (indicated by the language symbol). Click it to add or edit translations without leaving the cart designer.
Color Indicators: The button is green if translations in all languages are set. If something is missing, it will appear red.
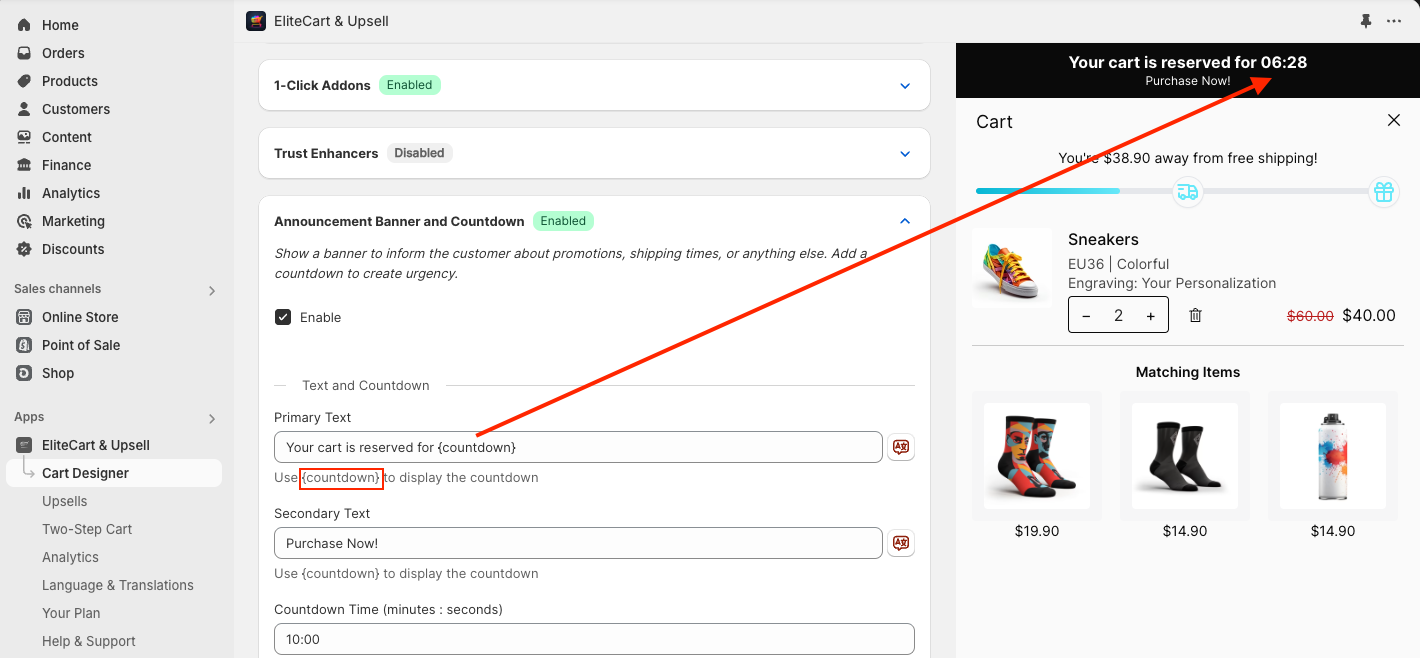
3. Dynamic Variables: If indicated in the helptext, you can use dynamic variables. Make sure not to translate the word within the curly brackets. You can see the filled-in version in the preview, e.g. for the {countdown} variable below.
These languages are already provided by us, but you can customize them as described above:
English
German
Spanish
French
Swedish
Danish
Norwegian
For any other language, you must set the texts yourself or use our AI translate feature.